Handmade Velociraptor Costume!
- Tiana Traffas Art

- Nov 1, 2022
- 3 min read
Updated: Nov 2, 2022

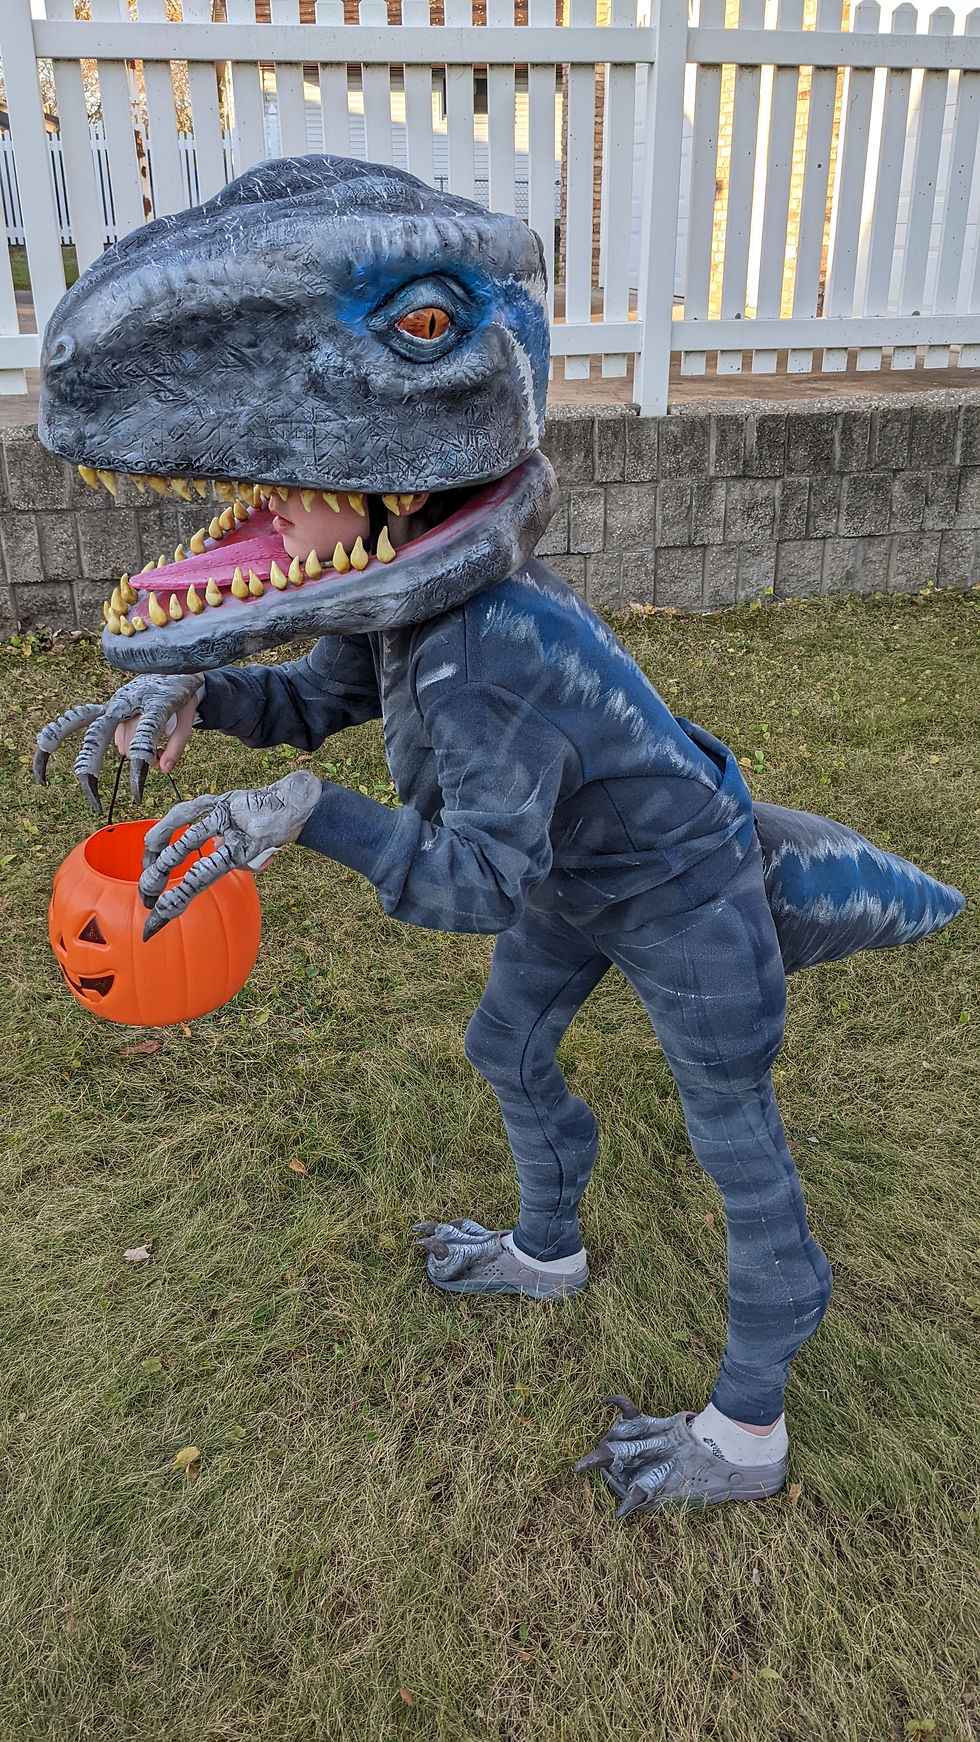
Okay, I promised I would share my daughter's Halloween costume when I was done making it. She wanted to be a velociraptor. She loves animals of all kinds and she's always teaching me new animal facts. I think the costume turned out amazing! I made it out of foam, foam clay, polymer clay, paint, and sweatpants.
Almost every single Halloween costume I have made for her has been built around a sweatpants and sweatshirt combo. This is because it's cheap, warm, comfy, and I hate sewing! This was my most challenging costume ever. Very sculptural.
The first steps were to make some sketches and do the "mind's eye work," which is basically just spending a lot of time in my head figuring it out and picturing what it would look like at all stages.
Then I cut and carved the foam. I hated this stage. It was difficult to say the least. I had to use a bread knife and a pair of scissors, the mess was overwhelming. I was covered in tiny pieces of foam and my hands ached for days afterwords.
Once I had the foam sculpted, I could start adding on the foam clay. This stuff is pretty cool. Obviously, the head needs to be lightweight and these materials are very light. I added texture to the surface with my fingers and a rubber tipped "brush." This gave it that dinosaur skin look. Waiting overnight for foam clay to dry drove me nuts. I just wanted to keep working. There were many times I thought I may not finish in time.
I sculpted and painted the eyes and teeth with polymer bake clay. I hand-painted them and coated them in a few layers of gloss to make them shine. I used paint to give the teeth dimension and give it a dirty plaque look. The tongue is sheet foam that I burned in texture, and painted with acrylics and gloss. The hands and feet are made out of foam clay and the claws are polymer clay. I used an old pair of almost out grown croc style shoes to make the feet. The foam clay stuck to them perfectly. As you can see, in the side-by-side of the shoes, the dry brushed paint makes a huge difference in bringing out the texture.
Then I moved onto painting the head, gluing in the teeth, and sculpting the eyes. This was the most fun because things were starting to take shape. With a project like this, it tends to look like a whole lotta nothing until the last day when all of the sudden stuff starts to come together. It's like magic. Below you'll see the spray paint layer, sculpted eyes- before and after painting, and teeth installation. To do the teeth, I poked a hole into the foam, squeezed some super glue inside, and then pressed the tooth into the jaw line.
Final touches mean lots of dry brushing in 3 shades of grey, white to highlight, and a touch of blue here and there. I used spray paint on the tail (a leg from old pair of leggings that I cut and sewed), sweatpants, and head. Then I used my brush to hand paint more detailed lines on the body, tail, and head.

I recruited my husband to help me figure out how to keep the thing together on her head. At this point it was the evening before Halloween and my brain was fried. He suggested velcro straps. It worked perfectly! To give the body a more dino shape, I strategically stuffed polyfill into her leggings and sweatshirt.
The finished costume:


It was so challenging to make a wearable sculpture in less than 2 weeks! I am exhausted and my arms, hands, body, and feet are killing me! A project this big (and on a time crunch) takes a lot out of you. It was a mad dash to get it done and I pushed myself, working for hours and hours non-stop. Not gonna lie, I cried a few times through this process 😆. Worth it. Homemade costumes are the best. And to see the joy on her face when it all came together 💔 made it all worth it. I hope you had a magical Samhain!


Comments